Latest & Greatest Products: March/April 2010
03/30/2010 at 5:00 am | Posted in Hot Trends, latest & Greatest, product, Uncategorized | 268 CommentsTags: BasicGrey, CK, Claudine Hellmuth Studio, Creating Keepsakes, Creating Keepsakes magazine, EK Success, giveaway, Jillibean Soup, Kim Jackson, latest & Greatest, patterned paper, products, Punches, Ranger Industries, Scrapbook, scrapbook supplies, Scrapbooking, stickers, TaDa Creative Studios
 While creating every issue of Creating Keepsakes, we have a blast looking through all of the new scrapbooking products, trying to decide which ones will make our Latest & Greatest column. Of course, we never have enough space for all of the goodies we’d love to share with you. So we’ve decided share a few more of the producs that sparked our imaginations from each issue here on our blog—and we’ll give you the chance to win some of the fabulous products. Let’s get rolling!
Claudine Hellmuth Studios – Ranger Industries
We discovered the amazing line of Claudine Hellmuth Studio products from Ranger Industries at CHA back in January, and shared a couple of videos of sweet Claudine demonstrating just a few of the fun things you can do with her Sticky Back Canvas. You’ll love adding texture and color to your pages with this wonderful, on-trend line of products.
Eggdrop Soup – Jillibean Soup
With Easter right around the corner, our eyes are open for bunnies hopping down the bunny trail. The adorable Eggdrop Soup line from Jillibean Soup is a perfect addition to your stash, whether you’re looking for something to jazz up your Easter pages or a simple, cute new way to add a splash of springtime to your pages.
Double-Sided Edger Punches – EK Success
A sweet daisy chain will add just the right touch of springtime charm to your layouts—and with EK Success’ new Daisy Chain punch, you’ll have a true daisy chain, punched out on both sides. You’ll love this new punch design, as well as the others in the EK Success’ new line.
Green at Heart – BasicGrey
Earth Day is on April 22, and you’ll love adding a touch of “green” to your layouts with BasicGrey’s bright and fabulous new Green at Heart line. Printed on FSC-certified paper with soy-based inks, you can have a wonderful time creating a scrapbooking layout and feel good knowing that your paper is eco-conscious.
Wow, that’s a lot of scrapbooking goodness! How would you like to win some of these products for yourself? (Silly question—of course you would.) In addition to giving away the products above, you’ll also have a chance to win the E-I-E-I-O Collection from TaDa Creative Studios, as seen on page 48 of our March/April 2010 issue.
All you have to do to win one of these outstanding products is leave a comment telling us which of our Latest & Greatest products from the March/April 2010 issue of CK (or from this post) is your favorite and why you love it by Monday, April 5. We’ll draw five random winners (one for each product shown here) on or around April 6 and announce the winners on the giveaways tab located at the top of our blog.
Have a wonderful day!
Kim Jackson, senior editor
Special Guest Blogger: Suzy Plantamura of the 2010 CK Dream Team
01/08/2010 at 2:15 am | Posted in fonts, guest blogger, How-Tos | 13 CommentsTags: acrylic accents, CK, coloring, Copic, Creating Keepsakes, Creating Keepsakes magazine, EK Success, free downloads, Free Font Friday, Gelly Roll, guest blogger, holiday, Krylon, marker, markers, Newell Rubbermaid, pen, pens, Sakura, Scrapbook, scrapbook pages, Scrapbooking, Sharpie, Stampin' Up!, Suzy Plantamura, technique, techniques
 Hi, I’m Suzy Plantamura, a member of CK’s Dream Team. I’m a kid at heart, and I love to color! My purse always has markers in it for my girls and me to draw and color with any time we’re sitting still (at church, at restaurants, on long drives, and more). I draw the pictures, and the girls stay quiet while they color in the pictures!
Markers are a perfect way to express creativity and add a bit of personality to scrapbook projects as well. For example, I made this “Elf Obsession” layout primarily with just cardstock and markers.

"Elf Obsession" by Suzy Plantamura. Supplies: Cardstock: Bazzill Basics Paper; Die-cutting machine and felt ornament: Making Memories; Stickers: Crate Paper, Making Memories, and My Mind’s Eye; Chipboard circles: My Mind’s Eye; Rhinestones: Zva Creative; Glitter: Martha Stewart Crafts; Markers: EK Success, Newell Rubbermaid, and Sakura; Adhesive: Scrapbook Adhesives by 3L; Other: Ribbon.
Techniques on This Layout:
I went a little crazy with markers on this layout, but it was so fun to make! Here are a few techniques I used:
* I drew the border on the layout with markers and then cut around its edges.
* I customized title letters by cutting them out of cardstock with the Slice by Making Memories, and then I added dots with a Gelly Roll pen. The pens are slow drying, so I added glitter to the dots while they were still wet.
* I outlined my photos with two colors of markers.
* I love elves, and my girls and I drew and colored them throughout the holiday season. I added a pocket to the back of my layout to include all our drawings.
* I used a black Ultra Fine Point Sharpie to draw the elves on cardstock, and I colored them in with Gelly Roll pens by Sakura—they are so fun to work with and glide on for perfect coverage! To make a color softer (such as when coloring skin tones), you can just use your finger to smear the color around.
More Techniques
The next layout I made also uses markers in many spots—see if you can find them all!

“Nailed by the Boys Once Again” by Suzy Plantamura. Supplies: Patterned paper: BasicGrey and Doodlebug Design; Chipboard letters: Pink Paislee; Letter stickers: Making Memories and My Little Shoebox; Border stickers: Crate Paper and Doodlebug Design; Transparencies and felt snowflakes: Little Yellow Bicycle; Acrylic snowflakes: Maya Road; Brads: Making Memories, Queen & Co., and SEI; Markers: Copic Markers, EK Success, and Newell Rubbermaid; Ribbon: Making Memories; Glitter: Martha Stewart Crafts; Adhesive: Scrapbook Adhesives by 3L; Other: Blue ribbon.
Did you find them all? Check the list here:
* First, I outlined the entire page with a silver Sharpie and outlined my photos with a white Uni-ball pen.
* I added small, white snowflakes to my title letters with the Uni-ball as well.
* I colored the edges of the transparencies with Copic markers.
* I added color to the edges of my punched borders with a pink marker.
* I colored acrylic snowflakes with markers to match my page.
Color Acrylic Accents
Follow these step-by-step instructions to color your own acrylic accents:
1. Remove plastic covering from both sides of an acrylic accent (if applicable).
2. Color one side of the snowflake with two colors of Copic markers, adding a lighter color over the entire accent and a darker color on just the edges.
 3. Use a silver pen to draw lines on the same side of the snowflake.
 4. If you make any mistakes and want to remove color, use the Copic Colorless Blender pen—it removes even Sharpie ink!
5. Turn snowflake over and use a white pen to add details to the front of the accent.

6. Tie a knot in a ribbon and pull it through the center of the accent; attach it to the layout with sheer adhesive.
My Favorite Pens
Here are some of my favorite markers and what I use them for:
* Uni-ball Signo by Newell Rubbermaid: The white Uni-ball is (in my opinion) the best white marker! I use it to journal, outline photos, and add details to embellishments. It is slow drying, so you can add glitter to it or emboss with it.
* Pigma Micron by Sakura and Ultra Fine Point Sharpie by Newell Rubbermaid: I use these two markers for journaling. The Pigma Micron pen comes in different tip sizes (I use the 05 style) and are pigment ink that is waterproof. The Sharpie is also permanent and great for use on transparencies or slick surfaces.
* Copic Markers: These pens are alcohol-based pigment ink, refillable, and will cover anything including metal, transparencies, ribbon, and acrylic. They come in tons of colors and different tips, with one tip on each end of the pens.
* Zig Writers by EK Success: These pens come in 48 colors and are pigment-based ink that is waterproof. I use the fine tip to journal and the thicker tip to color in items.
* Glaze, Soufflé, and Gelly Roll by Sakura: These markers are so much fun! They come in numerous colors and types of ink. I use them for coloring, because they blend well and smear great for lighter application. Glaze and Soufflé pens are slow drying, so you can use them to add glitter to or emboss a project.
* Stampin’ Write by Stampin’ Up!: These markers are great for coloring in designs using the brush tips. They have water-based dye ink, so although they have a fine tip, I don’t use them for journaling.
* Silver- and Gold-Leafing Pens by Krylon: These pens are fun for holiday projects! I use them to outline my pages or pictures, and they adhere well to any surface. The Sharpie Metallic markers also work great on slick surfaces.
I hope this blog post motivates you to pull out your markers and use them to add a bit of creativity to your scrapbook pages and craft projects. Embrace the kid in you, and have fun coloring!
—Suzy Plantamura
Free Font Friday
 Don’t let thoughts of a several goals for the new year stress you out. Instead, enjoy a relaxed feel with the CK Easy Goin’ font available for free download as part of Creating Keepsakes’ Free Font Friday. You’ll find a new free font available next Friday (and every Friday) as well.
Happy Halloween!
10/31/2009 at 4:00 am | Posted in Holidays | 2 CommentsTags: BoBunny, Brittany Beattie, CK, Creating Keepsakes, Die Cuts With A View, Dorathy Gilchrist, EK Success, Halloween, halloween product, Karen Foster Design, Lara Penrod, Lori Anderson, Megan Hoeppner, October issue
 It’s the scariest day of the year! Are you all set to go out and do a little spooking?
I have to admit, I’ve never really liked dressing up for Halloween. (The photo at left is one of only three that I could find of myself all dressed up!). But there are other Halloween traditions I like just fine: decorating with spooky spiders, bats and brooms. Carmel apples (I can really get behind those). Carving pumpkins is always fun, too.
Isn’t it funny that we carve pumpkins for Halloween? We all just accept that it’s a Halloween tradition as children, but have you ever wondered why we carve this large fruit from the squash family? Halloween started as the Gaelic festival known as Samhain (pronounced sow-in), which celebrated the end of the “light” half of the year and passage into the “dark” half of the year. People celebrated this event by displaying lighted turnips. Since the Celts didn’t have pumpkins (a new world food), turnips had to do. I’m glad we’ve switched to carving something I can actually fit my hand into!
What’s your favorite part of Halloween? Is it the candy? The costumes? Pulling the guts out of a poor little orange gourd? Or is it the new and exciting scrapbooking products that come out at this time of year? Yep, I thought that was probably the one!
If you missed our look at new Halloween product in our October issue, or just want to see more of what you love, here are some Halloween products that would be a treat to own.
Carving Pumpkins and Happy Halloween, EK Success.


Dancing Ghosts paper, Halloween Hodge Podge paper, and Halloween Stacked Statement,Karen Foster Design.


The Halloween Stack, Die Cuts With A View

From all of us at Creating Keepsakes, have a happy and safe Halloween!

Brittany Beattie, Managing Editor

Lori Anderson, Online Managing Editor

Dorathy Gilchrist, Associate Editor

Megan Hoeppner, Creative Editor

And the whole gang!
Be safe tonight!
Lara Penrod, Senior Editor
Sticky Techniques
10/22/2009 at 5:00 am | Posted in Uncategorized | 78 CommentsTags: adhesive, adhesive sheets, adhesive stickers, adhesives, adhesives week, Clearsnap, Creating Keepsakes, EK Success, Flock, Glitter, glue pad, glue pen, Lara Penrod, Scrapbook Adhesives by 3L, Scrapbooking, stamping, techniques, tips, Tsukineko
 Have you ever wondered what you’d do with some of the many adhesive products you see on the market today? Like you, I often think, “I’m sure that product’s really cool—if only I knew what to do with it.” We’ve put together a few techniques using adhesive to get you started. Hopefully, they’ll answer a few questions for you, and get you playing to find some of your own great techniques.
Adhesives Stickers
These fun adhesives will help you add a little sparkle to any project quickly. And they’re super easy to use!
Simply remove the backing from the sticker, place the design on your cardstock, peel away the cover paper, and apply glitter.

It’s that quick! If you want to use a couple different colors of glitter, simply peel away only a portion of the cover paper, and apply your first glitter.

Then peel away the remaining cover paper, and apply your second glitter.

In just moments, you’ll have a fun, sparkly accent for your page. Our cute cupcake came from Baby Cakes Design Adhesives by Clearsnap.

Glue Pens
We all have a glue pen in our stash of tools. But your glue pen can do more than just adhere cardstock and photos to your page. It’s also the perfect tool to apply glitter to a small area, adding that little bit of zing to your page. I used my glue pen to add glitter to one of the flowers on my patterned paper.

To create this effect, simply trace the outline with your glue pen,

add glitter and shake off the excess glitter. I loved this paper before, but the glitter just added that little something extra.

You can also use your glue pen to add dimension to your page by applying flock to buttons or brads.
Apply glue directly to the brad,

dip the brad in flock,

rub the flock into the glue with your finger,

shake off the excess, and you’ve got a colorful, flocked brad!

Try using the Zig 2-Way Glue pen by EK Sucess for this technique.
Glue Pads
The best invention since white bread! Oh yes, I was that excited when I saw glue pads hit the market. They’re just like ink pads, but they’re glue! What a great way to apply glitter and flock to you pages. You can use them with stamps or to cover whole pieces of chipboard. For these projects, I used the Essential Glue Pad from Tsukineko.

To stamp an image, simply “ink” your stamp using the glue pad,

stamp the image,

and apply glitter or flock and shake off the excess.

Tip: One thing we found while using flock is that it works best with less intricate designs.
Another technique to try is covering an entire piece of chipboard with glitter or flock. First, simply press the chipboard onto the glue pad,

then apply glitter or flock and shake off the excess.

It’s that easy. And once it’s dry, the glitter stays in place!

Adhesive Sheets
Perhaps you couldn’t think of a use for a full sheet of adhesive, but I’m here to tell you, this is one product you’re going to want in your toolbox. It’s great for adhering those tiny or intricate elements your page, such a little letters.

Cut the sheet of adhesive to the desired size.

Then apply the adhesive sheet to your patterned paper or cardstock.

Cut out your letters or shape.

Remove the letters or shapes for the backing,

and adhere to your page.

Using adhesive sheets is so much easier than trying to apply adhesive to tiny pieces. And if you’re using an alphabet die, you’ve got extra letters to use another day.
While adhesive sheets make light work of adhering tiny embellishments, you can also think big when it comes to this great product. Using a sheet of adhesive is also a great way to cover a large area of your page.

Here I’ve created a quick border for my page using a strip of adhesive and flock. Trim an adhesive sheet to the size of your page and apply to the edge. You’ve covered a large area of your page in no time! Give the 12″ x 12″ Adhesive Sheets from Scrapbook Adhesives by 3L a try for these great project ideas.
We hope this quick look at a few adhesive techniques gets your creative juices flowing. Leave us a comment and let us know how you’re using these great adhesive products. We’ll select two winners from the comments to each win an adhesive grab bag.
Lara Penrod
Senior Editor
Weekly Warm-Up: Adhesives Week
10/19/2009 at 1:45 pm | Posted in weekly warm up | 150 CommentsTags: 3M, adhesive, adhesives week, Aleene's, blog candy, Clearsnap, Creating Keepsakes, creative editor, EK Success, Elmer's, giveaway, glue, Glue Arts, Glue Dots, Helmar, Henkel, KI Memories, Kokuyo, Megan Hoeppner, QuicKutz, Sakura, Scrapbook Adhesives by 3L, Scrapbooking, techniques, Therm O Web, tips, Uhu
 Looks like you’ve gotten yourself into a sticky situation, my friend. This is “Adhesives Week” on our blog! Did you get a chance to check out our comprehensive adhesives article in our October issue? Well, this is an e-expansion of that adhesives-how-to. By the time this week is through, we hope to answer some of your most common adhesive questions in the following categories:
Tips
With an entire row of adhesives available, how can I know what kind is best to use with my specific project needs? This is just one of the many glue-based questions we get asked on a regular basis. And while we did address it thoroughly in our October magazine feature, we will take it further this week.
In the spirit of tips, I’ll start this attractive party with one of my favorites:
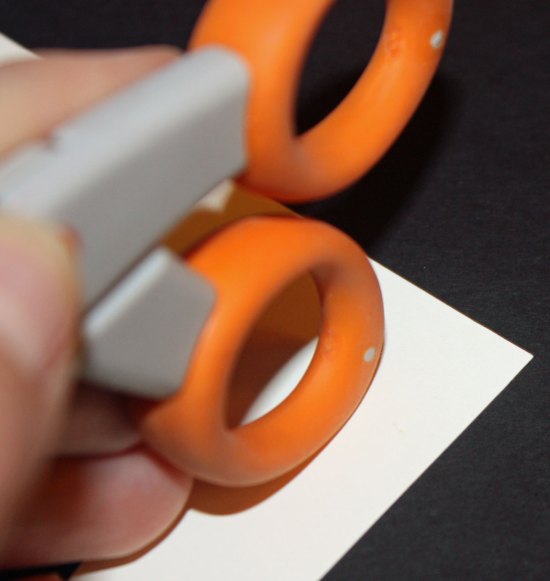
When you’re gluing and notice you’ve smudged your pretty cardstock with adhesive runoff, don’t fear. Simply use an eraser to lift the gunk from your paper. Or, if you don’t have an eraser, you can always use the soft-rubber handles of scissors—something I do on a regular basis.
Techniques
Adhesive is a must when it comes to scrapbooking, but how can I take it beyond tacking elements down? The various adhesive types offer so much in the way of creative potential. This week we’ll dedicate blog space to exploring some of these unique ideas. Let’s get started with something I put together.
Add depth to pen stitching using a glue pen and glitter or flocking. The added texture will feel more like real stitching without the need of a sewing machine or the risk of a poked finger.
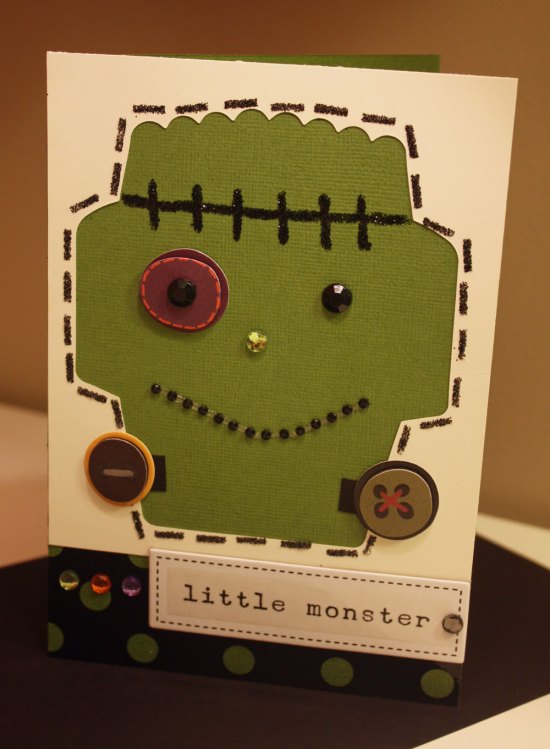
I applied the pen stitching technique across Frank’s forehead.
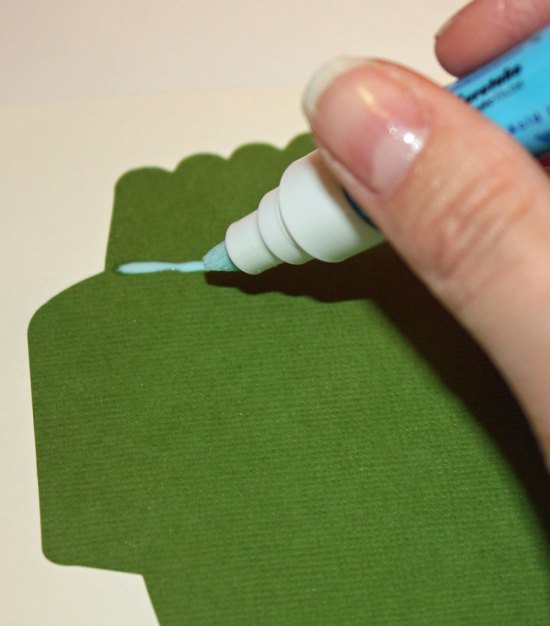
Tip: Make sure you add the glitter before the glue dries. With this pen, the glue is blue when it’s wet. Once the glue begins going clear, you’ll know it’s drying.
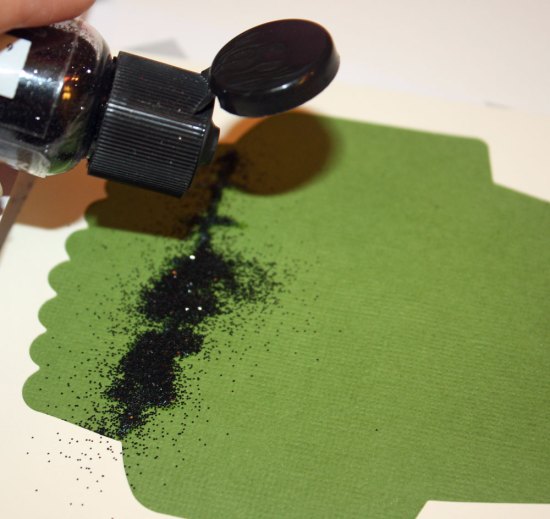
For the stitching around Frank’s head, I used small strips from my adhesive runner.
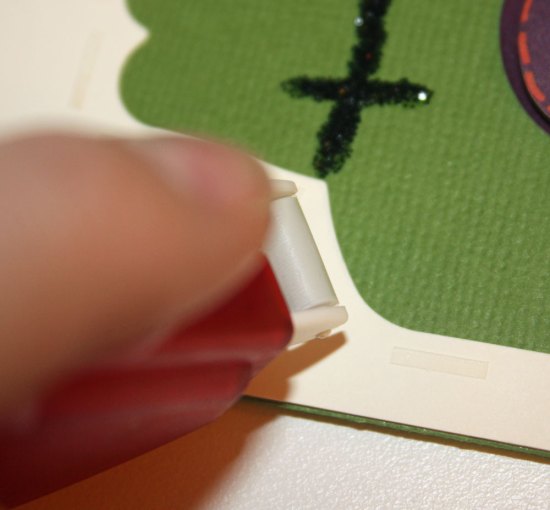
Using the adhesive strips keeps the “stitches” around the outside of the card even.

Giveaways
What’s Adhesives Week without “Glue Grab Bags?” That’s like Shark Week without the shark—it isn’t gonna happen. Everyday this week, we’ll select two winners from each post to receive an impressive bag o’ adhesive (M – Th). And we’ll conclude the fun with a special guest blogger on Friday who happens to be hosting a grand giveaway of her own!

Thanks to our Sponsors
We couldn’t have done all of this without our amazing Adhesives Week sponsors. A special thanks to each of the following companies. Way to stick it to ‘em!
3M
Aleene’s
Clearsnap
EK Success
Elmer’s
Glue Arts
Glue Dots
Helmar
Henkel
KI Memories
Kokuyo
QuicKutz
Sakura
Scrapbook Adhesives by 3L
Therm O Web
Uhu
Cheers!
Megan Hoeppner, Creative Editor
Weekly Warm-Up: Raise Awareness through Cropping & Shopping
10/05/2009 at 3:27 am | Posted in weekly warm up | 92 CommentsTags: Breast Cancer Awareness, Duck, EK Success, Fiskars Americas, giveaway, Making Memories, Megan Hoeppner, Neatnix, Per Annum, Scrap Pink, Scrapbook Adhesives by 3L, Slice, Stone Creek Creations, Susan G. Komen, Technique Tuesday, Xyron
 My mom is fighting the good fight. Last October, she was diagnosed with breast cancer. Since then, she’s been going through rigorous treatments, fighting for her life—fighting for multiple lives, really, as she is the nucleus of our family, the light at the center of it all! It’s because of support and research that my mom is here to fight. You see, she has an aggressive form of cancer that up until relatively recently made it next to impossible for those that had it to survive. Now, I’m delighted to say, there’s a special therapy that greatly increases the survival rate of this kind of cancer. Each and every thing we do to show support makes steps like this possible.

In the spirit of making strides, we want to welcome October, Breast Cancer Awareness Month, in a very positive way, by uniting in this good fight. Like me, so many on our magazine team have first-hand experience with this common killer, just as, I imagine, do many of you. Rather than dwell on this sobering fact, let’s use it as a motivator that springs us into action. Deal? Deal!

SHOPPING
Whether you need more everyday supplies or are looking to add a little something special to your craft collection, we’ve compiled a list of scrapbooking goodies which, when purchased, proceeds are donated to breast cancer-related causes.

Adhesives
Scrapbook Adhesives by 3L offers a full line of Nat’l Breast Cancer Foundation products, with 5% of each purchase donated.

Xyron designed its Create-a-Sticker machine in the shape of a pink ribbon, and $0.50 from each purchase benefits the Breast Cancer Research Center. Cute and cool!

Duck brand tape offers an assortment of breast-cancer specific products and donates $0.10 to $0.20 to the Breast Cancer Research Foundation.

Tools
Slice it up, and Making Memories will donate a portion of your purchase to aid in the breast cancer search for a cure.

Support Susan G. Komen for the Cure with the Sizzix Scrap Pink Kit and 5% of your purchase will be donated.

Organization
StoneCreek Creations donates $2 from the purchase of every Passion Pink Krafter’s Purse to support the cause and the totes even come with a special pink-ribbon pin.

Put your stuff in the Neatnix Stuff Buckets; put your money towards a good cause. Plus, as a loyal CK reader, Neatnix is offering you a special 15% off discount. Simply type in “Creating” as your coupon code in the shopping cart.

Stamps
Half of the money spent on the purchase of this beautiful Celebrate Life stamp set from Technique Tuesday goes to the Susan G. Komen Foundation.

CROPPING
Since you’re already going to be out and about making new and wonderful purchases, why not visit a local scrapbook store participating in the Scrap Pink event? Find a complete list of participating stores and additional information on Scrap Pink here.
WINNING

To start this incredibly moving month off right, we’ve decided to throw in a giveaway. Four lucky winners will receive an assortment of breast cancer products (assortments shown above). To enter, simply leave a comment on this post by Thursday, October 8. We’ll post our winners next Monday. We’d like to thank the following prize sponsors for donating their beautiful products: EK Success, Fiskars Americas, Per Annum and SRM Stickers.
Breast cancer is far too common, but we’re strong. Together we will find a cure. Together we will offer support for the millions impacted both directly and indirectly. Together we will fight the good fight!
Warmly,
Megan Hoeppner, Creative Editor
P.S. Don’t forget to check the Giveaways tab at the top of the page to see winners of our most recent giveaways.
Special Guest Blogger: Maggie Holmes
06/19/2009 at 9:14 pm | Posted in guest blogger | 6 CommentsTags: Creating Keepsakes, EK Success, Elle's Studio, Fiskars, green scrapbooking, guest blog, Maggie Holmes, Making Memories, Sassafras, Scrapbooking, Studio Calico
 Hi there everyone, I’m Maggie Holmes, a member of the 2009 Creating Keepsakes Dream Team. I’m excited to be this week’s guest blogger! Even though it is Summer, I am in the mood for cleaning up and clearing out. Well, actually, it seems like I am always in that “Spring Cleaning” mode around here—always trying to keep control of the constant inflow of papers, packaging and stuff! And especially here in my scrapbook room; it can be hard to keep it under control!
And even though I do love the feeling of purging and throwing out the excess, I also feel bad about just throwing things away—especially if they are cute and usable! I have always been a fan of cute packaging and I love to repurpose it and use it on my scrapbook layouts when I can. And it means that I am throwing out less and being a little more “green.” You gotta love that, right?
I have found that manufacturers seem to be making their packaging cute and reusable even more so lately, which is so fun! A few of my recent favorites that I have added to my stash are these adorable ones from Sassafrass, Making Memories, Studio Calico and Elle’s Studio.

Another one of my favorite things is to use my punches to create custom accents for my scrapbook pages. Then I can make things the exact size, color and shape that I want them! So, combining both of these—packaging and punches—makes me a happy girl!! Doing this very thing, I created a layout of my little girl, Emily, and I managed to use all four of pieces of packaging on my page! Plus, I still have quite a bit of each one left that I will be able to use again in the future.

In case you can’t tell where I have used the packaging, here are the details:
1. I used my favorite corner punch from EK Success to create both of these photo corners from the Elle’s Studio and the Studio Calico Packaging. After punching them I used a black marker to outline the edges just to give the corners a little more definition.

2. I used the upper crest border punch from Fiskars to punch a strip of paper from the Making Memories packaging.
3. I cut out a strip from the Sassafrass packaging and tucked it under the other strip. I LOVE to add little strips of paper to my layouts and packaging is perfect to use for these. I will often use my scallop scissors to cut strips from packaging as well.

3. I used a square punch and the Sassafrass packaging to create these two boxes. Then I simply used a marker to outline the box and a rub-on for the check marks.

If you aren’t already saving your packaging to use like I do, I challenge you to look more closely at it before you toss it into the trash. You will probably find that there are lots of cute things you can save to use on your scrapbook layouts. Once you learn to see the potential in those typically tossed scraps, the sky is the limit!
Have fun!
Maggie
For more from Maggie, check out her work in the July issue of CK and visit her happy blog!
The Emblem of the Land I Love
06/14/2009 at 12:35 am | Posted in Uncategorized | 3 CommentsTags: Beth Opel, CK, Creating Keepsakes, Creating Keepsakes magazine, Creative Imaginations, E-Cuts, EK Success, flag, flag day, flag day quotes, flag quotes, Jenny Bowlin Studio, Memories in Uniform, patriotic, patriotic scrapbooking, quotes, Reminisce, Scrapbooking, Technique Tuesday
 Greetings to all our blog friends on this beautiful Sunday!
You know if I’m coming to you on a weekend, that must mean it’s a special holiday of some sort. Sooooo, for us Americans, today we pay tribute to our national symbol.
It is only fitting to take a day to celebrate our flag, since it represents independence as well as unity. The flag evolved as our country evolved, undergoing 26 facelifts before taking the form we see today. Many proud Americans gave their lives defending it around the globe, and there’s even a flag on the surface of the moon!
Check out some inspiring flag quotations here.
Our fascination with the flag can be seen in our created objects as well:

Did you notice–one of the flags is a photo montage of flowers, another is made from postage stamps and the final one contains the words to the Declaration of Independence? I love how Old Glory lends itself to collage, because we as a nation are a conglomeration of so many different people!
Of course, plenty of flag-waving products are available to scrapbooking enthusiasts. Here’s just a sampling:

- Products from Reminisce, Creative Imaginations, Jenni Bowlin Studio, Technique Tuesday, Memories in Uniform, EK Success and E-Cuts
So think on the flag today. If you have one, wave it, display it or even wear it if you are so inclined. Pledge allegiance to it, and rejoice in the freedom it represents!

Your flag and my flag,
And how it flies today
In your land and my land
And half a world away!
Rose-red and blood-red
The stripes for ever gleam;
Snow-white and souldwhite–
The good forefathers’ dream;
Sky-blue and true-blue, with stars to gleam aright–
The gloried guidon of the day; a shelter through the night.
– Wilbur D. Nesbit, “A Song for Flag Day.”
Beth Opel
Senior Writer, Creating Keepsakes
Create a free website or blog at WordPress.com.
Entries and comments feeds.


 Cindy Tobey




 Sara Winnick
 Susan Weinroth
 Suzy Plantamura
 Wendy Sue Anderson
 A New Contributing Writer