Happy Halloween!
10/31/2009 at 4:00 am | Posted in Holidays | 2 CommentsTags: BoBunny, Brittany Beattie, CK, Creating Keepsakes, Die Cuts With A View, Dorathy Gilchrist, EK Success, Halloween, halloween product, Karen Foster Design, Lara Penrod, Lori Anderson, Megan Hoeppner, October issue
 It’s the scariest day of the year! Are you all set to go out and do a little spooking?
I have to admit, I’ve never really liked dressing up for Halloween. (The photo at left is one of only three that I could find of myself all dressed up!). But there are other Halloween traditions I like just fine: decorating with spooky spiders, bats and brooms. Carmel apples (I can really get behind those). Carving pumpkins is always fun, too.
Isn’t it funny that we carve pumpkins for Halloween? We all just accept that it’s a Halloween tradition as children, but have you ever wondered why we carve this large fruit from the squash family? Halloween started as the Gaelic festival known as Samhain (pronounced sow-in), which celebrated the end of the “light” half of the year and passage into the “dark” half of the year. People celebrated this event by displaying lighted turnips. Since the Celts didn’t have pumpkins (a new world food), turnips had to do. I’m glad we’ve switched to carving something I can actually fit my hand into!
What’s your favorite part of Halloween? Is it the candy? The costumes? Pulling the guts out of a poor little orange gourd? Or is it the new and exciting scrapbooking products that come out at this time of year? Yep, I thought that was probably the one!
If you missed our look at new Halloween product in our October issue, or just want to see more of what you love, here are some Halloween products that would be a treat to own.
Carving Pumpkins and Happy Halloween, EK Success.


Dancing Ghosts paper, Halloween Hodge Podge paper, and Halloween Stacked Statement,Karen Foster Design.


The Halloween Stack, Die Cuts With A View

From all of us at Creating Keepsakes, have a happy and safe Halloween!

Brittany Beattie, Managing Editor

Lori Anderson, Online Managing Editor

Dorathy Gilchrist, Associate Editor

Megan Hoeppner, Creative Editor

And the whole gang!
Be safe tonight!
Lara Penrod, Senior Editor
Special Guest Blogger: Tia Bennett
10/30/2009 at 4:00 am | Posted in guest blogger | 32 CommentsTags: CK Argyle, Free Font Friday, guest blog, paper flowers, Scrapbooking, techniques, Tia Bennett, TwoPeasinaBucket
 Hello fellow scrapbooking friends! I am Princess Leia (okay, so I’m really Tia Bennett, but I thought I’d play a little trick on you), and it’s a good thing I’m here at the end of this Halloween week of fun because the Creating Keepsakes Blog is really on a hauntingly good roll.
And so is my hair. (Can I get a rim-shot?)
And, believe it or not, the theme of a fun technique I’d like to share with you today is also all about rolls—rolled paper flowers, to be exact!

Here is a simple, fun technique to add some layered, textural goodness to any paper craft, be it a layout, a mini-album or even the front of a card. All you need is a hot glue gun, some non-stick scissors, a 1″ strip of paper, fabric or ribbon (approximately 15″-20″ long; if paper, then two 12″ strips will suffice), a scrap of cardstock about three inches square, and if you’re really feeling like having fun, some color mist spray.

First, fold your paper strips in half lengthwise. Twist the paper strips down the full length of the strip with a “scrunching” kind of motion as you go.

On your cardstock scrap, add a spiral of hot glue about 2 ½” in circumference.

Working quickly before the hot glue cools, start in the center of the flower and gently press the twisted paper strips onto the hot glue base. Spiral outward as you go. Add a second strip starting on the spiral where the first one finishes off. Once cooled, check to see that your paper twists are secure; you may need to go back in and add a dab of glue here or there.

Once your flower is secure and the glue is cool, cut around the base with your non-stick scissors to remove any excess cardstock.

To add another layer of interest to your new blossom, lightly spray with color mist. As a final touch, add a gem or jewel to the flower center. Now it’s ready for your project!

You can repeat this process with a myriad of supplies. If you’re concerned about the archival quality of the hot glue, you can use a more archival-friendly type of adhesive to put your rolled paper flower together, such as a strong double-sided tape.
Here’s the finished product put to use on a layout, along with some other rolled flower friends made of fabric and ribbon:

Thank you for stopping in on this frightfully fun day, and I wish you all a delightfully safe and happily haunted holiday!
Tia Bennett
For more inspiring ideas from Tia, visit her blog and check out her amazing product designs on TwoPeasinaBucket.com.
 Hey, everyone! It’s Friday, and you know what that means?! Free Font Friday! Isn’t it spooktacular? Enjoy our latest free font, CK Argyle.
Trend Talk: Halloween Haunts
10/29/2009 at 4:00 am | Posted in Hot Trends | 6 CommentsTags: Apartment Therapy, BasicGrey, Charlie Brown, Creating Keepsakes, creative editor, Etsy, Grandin Road, Halloween, Little Yellow Bicycle, Lori Fairbanks, Megan Hoeppner, Target, Taste of Home, Tia Bennett, Trend Talk, Two Peas in a Bucket, Uncommon Goods, Z Gallerie


Weekly Warm Up: Creative Challenges
10/26/2009 at 4:00 am | Posted in weekly warm up | 3 CommentsTags: 52 More Scrapbooking Challenges, challenge, CK & Me, Creating Keepsakes, Editor-in-Chief, Elizabeth Kartchner, Halloween, Jennafer Martin, Sneak Peek
 Happy Halloween week! Whether you’re planning to dress up (as I did here as part of the Paper Crafts pirate crew in 2006), dress your kids up, haul yourself or your kids to haunted houses or parties, hand out candy to trick-or-treaters or nothing much at all, I hope you have a fun week in the spirit of this exciting holiday.
Halloween being upon us isn’t the only reason we’re excited here at Creating Keepsakes. We’ve also got a CK book release upon us: The exciting 52 More Scrapbooking Challenges by the fabulously talented Elizabeth Kartchner. This follow up to our popular 52 Scrapbooking Challenges book if full of inspiring new ways to stretch your creative scrapbooking muscles.

In the book’s sneak peek on our website, one of the challenges is to use a specific time for your next layout’s title. Elizabeth used her daughter’s favorite time of day for her title, the time her dad comes home from work. Why not take up the challenge and create a layout with a specific time as part (or all) of your title? Try scrapbooking the exact time that you:
*met your best friend or future spouse
*graduated from school or finished your thesis
*watched someone you love accomplish a goal or win an award
*took the stage as part of a production or concert
*realized you were going to be a parent for the first time
*heard someone famous, whose work meant a great deal to you, had passed away (JFK, Elvis, Michael Jackson, etc.)
*gave birth to your child or finalized the adoption
*made a decision to change your appearance or your life in some way
*witnessed an historic occasion, such as seeing the first space shuttle launch or an Olympic athlete or team beat the odds to win the gold
*first entrusted your child with a babysitter or teacher
*won the lottery
OK, so maybe you haven’t experienced that last one yet (I know I haven’t). These are just some ideas to get you started. Since scrapbooking is about capturing those moments that make up our life stories, why not take up the challenge and tell one moment of your story with the time it began?
Which time will you scrapbook? Leave a comment and let us know. When you’re finished, send us a link to your posted page as part of the CK & Me Challenge. Your page could be highlighted here on our blog or in a future issue of Creating Keepsakes magazine.
Happy Halloween week!
~Jennafer Martin, Editor-in-Chief
Special Guest Blogger: Tracy Weinzapfel of Helmar USA
10/23/2009 at 4:00 am | Posted in guest blogger | 136 CommentsTags: adhesives week, blog candy, Creating Keepsakes, Free Font Friday, guest blogger, Halloween, Helmar, mini-album, Scrapbooking, Tracy Weinzapfel
 Hi, my name is Tracy Weinzapfel and I am thrilled to be a guest blogger on the Creating Keepsakes blog this week in celebration of Adhesives Week. Personally, I think this should be made an international holiday, complete with a day off of work to craft. What do you say? Are you with me on this?
I suppose it makes sense that I react to Adhesives Week in this way, as I’m the President of Helmar USA, an international adhesives company. Yes, I have a lifetime supply of glue, and I even glue for a living, which is a pretty great gig. Sometimes I want to pinch myself because I can incorporate my business management and creative skills in one dream job.
With this experience, I’m delighted to celebrate the fall season and show off some of our awesome adhesives today with a fun Halloween mini album. This is a fast and easy way to showcase those fun Halloween photos.

Trick or Treat Mini Album by Tracy Weinzapfel. Supplies Chipboard album and patterned paper: Nikki Silvils; Die cut tags and stickers: Best Creation Inc.; Ink and stamp: Inkadinkado; Buttons: Buttons Galore & More; Trim: Creative Impressions; Tools: We R Memory Keepers (hole punch) and Helmar (Glue Spreader); Adhesive: Helmar (450 Quick Dry, Acid Free Glue, Liquid Scrap Dots and Permanent Adhesive Runner).

Step By Step Instructions
1. Cover chipboard album with Acid Free Glue and spread evenly with Glue Spreader.


2. Adhere patterned paper and trim excess with a craft knife.
3. Sand all edges with sanding block and distress with black ink.
4. Punch hole in upper left side of album.
6. Print ten wallet-size (2″ X 3″) photos with black border (or mount photos on black cardstock).
7. Adhere each photo to your album with permanent adhesive.
8. Adhere ribbon and buttons to pages with 450 Quick Dry, which will not bleed through even the sheerest of ribbons and fabrics!

9. Cut out ghost and pumpkins from the patterned paper and adhere with Liquid Scrap Dots, which will allow your embellishments to pop off the page.

10. Stamp “Trick or Treat” on patterned paper and apply to cover with Liquid Scrap Dots.
11. Assemble album with a jump ring, and tie ribbon and tag to ring to complete the look.

Helmar USA carries a complete line of adhesives to meet your every gluing need. Make sure to visit our new website and check out our design team blog for more creative ideas using our products. Our creative team regularly shares project ideas that amaze me.
Giveaway
In honor of Adhesives Week, I want to share some of our great products with 10 lucky CK blog readers. Please leave a comment for a chance to win a variety of Helmar products.
Thank you. I hope you’ve enjoyed all that this week has had to offer. Adhesives Week may not be an internationally recognized holiday yet, but I still think we should all take the day off to craft.
Happy gluing!
Tracy Weinzapfel
Note: Winners for this and all Adhesives Week blog posts will be listed under our “Giveaway” tab at the top of the blog on Tuesday, Oct. 27, so please be sure to check back to see if you were selected. You have between now and Sunday, Oct. 25 to qualify. Simply leave a comment on any of our Adhesives Week entries. Thanks!
 We love Free Font Friday, don’t you? This week, our free font is CK Buzz. Click here
 to download this fun, handwritten font.
Sticky Techniques
10/22/2009 at 5:00 am | Posted in Uncategorized | 78 CommentsTags: adhesive, adhesive sheets, adhesive stickers, adhesives, adhesives week, Clearsnap, Creating Keepsakes, EK Success, Flock, Glitter, glue pad, glue pen, Lara Penrod, Scrapbook Adhesives by 3L, Scrapbooking, stamping, techniques, tips, Tsukineko
 Have you ever wondered what you’d do with some of the many adhesive products you see on the market today? Like you, I often think, “I’m sure that product’s really cool—if only I knew what to do with it.” We’ve put together a few techniques using adhesive to get you started. Hopefully, they’ll answer a few questions for you, and get you playing to find some of your own great techniques.
Adhesives Stickers
These fun adhesives will help you add a little sparkle to any project quickly. And they’re super easy to use!
Simply remove the backing from the sticker, place the design on your cardstock, peel away the cover paper, and apply glitter.

It’s that quick! If you want to use a couple different colors of glitter, simply peel away only a portion of the cover paper, and apply your first glitter.

Then peel away the remaining cover paper, and apply your second glitter.

In just moments, you’ll have a fun, sparkly accent for your page. Our cute cupcake came from Baby Cakes Design Adhesives by Clearsnap.

Glue Pens
We all have a glue pen in our stash of tools. But your glue pen can do more than just adhere cardstock and photos to your page. It’s also the perfect tool to apply glitter to a small area, adding that little bit of zing to your page. I used my glue pen to add glitter to one of the flowers on my patterned paper.

To create this effect, simply trace the outline with your glue pen,

add glitter and shake off the excess glitter. I loved this paper before, but the glitter just added that little something extra.

You can also use your glue pen to add dimension to your page by applying flock to buttons or brads.
Apply glue directly to the brad,

dip the brad in flock,

rub the flock into the glue with your finger,

shake off the excess, and you’ve got a colorful, flocked brad!

Try using the Zig 2-Way Glue pen by EK Sucess for this technique.
Glue Pads
The best invention since white bread! Oh yes, I was that excited when I saw glue pads hit the market. They’re just like ink pads, but they’re glue! What a great way to apply glitter and flock to you pages. You can use them with stamps or to cover whole pieces of chipboard. For these projects, I used the Essential Glue Pad from Tsukineko.

To stamp an image, simply “ink” your stamp using the glue pad,

stamp the image,

and apply glitter or flock and shake off the excess.

Tip: One thing we found while using flock is that it works best with less intricate designs.
Another technique to try is covering an entire piece of chipboard with glitter or flock. First, simply press the chipboard onto the glue pad,

then apply glitter or flock and shake off the excess.

It’s that easy. And once it’s dry, the glitter stays in place!

Adhesive Sheets
Perhaps you couldn’t think of a use for a full sheet of adhesive, but I’m here to tell you, this is one product you’re going to want in your toolbox. It’s great for adhering those tiny or intricate elements your page, such a little letters.

Cut the sheet of adhesive to the desired size.

Then apply the adhesive sheet to your patterned paper or cardstock.

Cut out your letters or shape.

Remove the letters or shapes for the backing,

and adhere to your page.

Using adhesive sheets is so much easier than trying to apply adhesive to tiny pieces. And if you’re using an alphabet die, you’ve got extra letters to use another day.
While adhesive sheets make light work of adhering tiny embellishments, you can also think big when it comes to this great product. Using a sheet of adhesive is also a great way to cover a large area of your page.

Here I’ve created a quick border for my page using a strip of adhesive and flock. Trim an adhesive sheet to the size of your page and apply to the edge. You’ve covered a large area of your page in no time! Give the 12″ x 12″ Adhesive Sheets from Scrapbook Adhesives by 3L a try for these great project ideas.
We hope this quick look at a few adhesive techniques gets your creative juices flowing. Leave us a comment and let us know how you’re using these great adhesive products. We’ll select two winners from the comments to each win an adhesive grab bag.
Lara Penrod
Senior Editor
Scavenger Hunt
10/21/2009 at 5:00 am | Posted in Scavenger Hunt, Uncategorized | 13 CommentsTags: Amanda Probst, Cindy Tobey, Creating Keepsakes magazine, Dorathy Gilchrist, giveaway, Grace Tolman, Heidi Sonboul, Megan Hoeppner, November issue, Pam Callaghan, Rita Shimniok

Fall is in full swing and we hope ya’ll are enjoying the cooler days and beautiful colors, not to mention gearing up for all the fun holidays. Since next week is the big candy haul, we’ll warm you up with a different sort of hunt.
Pick up a copy of our November 2009 issue, filled with sweet ideas and technique treats. Find the answers to the questions below, and email them to  ckblog@creatingkeepsakes.com. Be sure to put “scavenger hunt” in the subject line so we can find your entry. We’ll choose two winners to receive one of this week’s adhesive grab bags. (One less thing to ask Santa for later!) We’ll announce our winners on Monday, so be sure to check back to see if you’ve won!

1. What fun photo trick did Amanda Probst use to make the accents on her “A Leaf Hunt” layout?
2. What did Rita Shimniok adhere to her stitching in “Leaf Collector”?
3. Last Thanksgiving Megan Hoeppner made this with her ‘table scraps’.
4. According to Pam Callaghan (“New Hairdo”), what fun effect comes from cutting your paper image while the watercolor is drying?
5. What ‘real life element’ did Grace Tolman use to help title her layout “Muddy Maddie”?
6. According to the “Cool Things” column, this look is back in style.
7. How did Cindy Tobey create the yard line feeling in her layout “It’s All about the Dance”?
8. What is the go-to look of the season?
9. Heidi Sonboul used these two punches to create the fun shapes in “Colorful Leaves”.
10. List three tips given to create great heritage layouts.
Grab your issue and start hunting! And don’t get lost along your way!
Dorathy Gilchrist
Associate Editor
Weekly Warm-Up: Adhesives Week
10/19/2009 at 1:45 pm | Posted in weekly warm up | 150 CommentsTags: 3M, adhesive, adhesives week, Aleene's, blog candy, Clearsnap, Creating Keepsakes, creative editor, EK Success, Elmer's, giveaway, glue, Glue Arts, Glue Dots, Helmar, Henkel, KI Memories, Kokuyo, Megan Hoeppner, QuicKutz, Sakura, Scrapbook Adhesives by 3L, Scrapbooking, techniques, Therm O Web, tips, Uhu
 Looks like you’ve gotten yourself into a sticky situation, my friend. This is “Adhesives Week” on our blog! Did you get a chance to check out our comprehensive adhesives article in our October issue? Well, this is an e-expansion of that adhesives-how-to. By the time this week is through, we hope to answer some of your most common adhesive questions in the following categories:
Tips
With an entire row of adhesives available, how can I know what kind is best to use with my specific project needs? This is just one of the many glue-based questions we get asked on a regular basis. And while we did address it thoroughly in our October magazine feature, we will take it further this week.
In the spirit of tips, I’ll start this attractive party with one of my favorites:
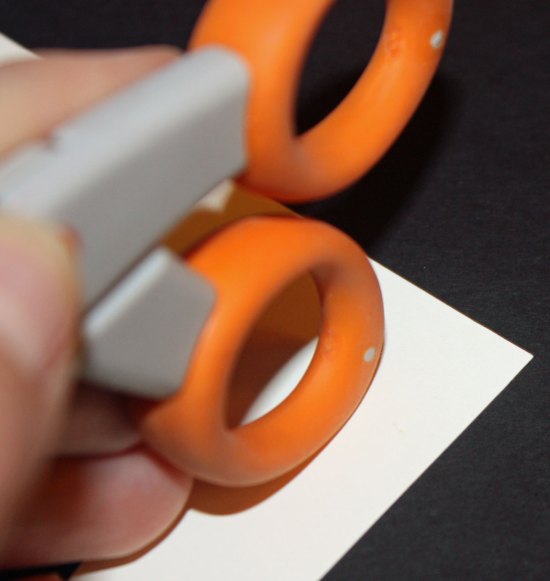
When you’re gluing and notice you’ve smudged your pretty cardstock with adhesive runoff, don’t fear. Simply use an eraser to lift the gunk from your paper. Or, if you don’t have an eraser, you can always use the soft-rubber handles of scissors—something I do on a regular basis.
Techniques
Adhesive is a must when it comes to scrapbooking, but how can I take it beyond tacking elements down? The various adhesive types offer so much in the way of creative potential. This week we’ll dedicate blog space to exploring some of these unique ideas. Let’s get started with something I put together.
Add depth to pen stitching using a glue pen and glitter or flocking. The added texture will feel more like real stitching without the need of a sewing machine or the risk of a poked finger.
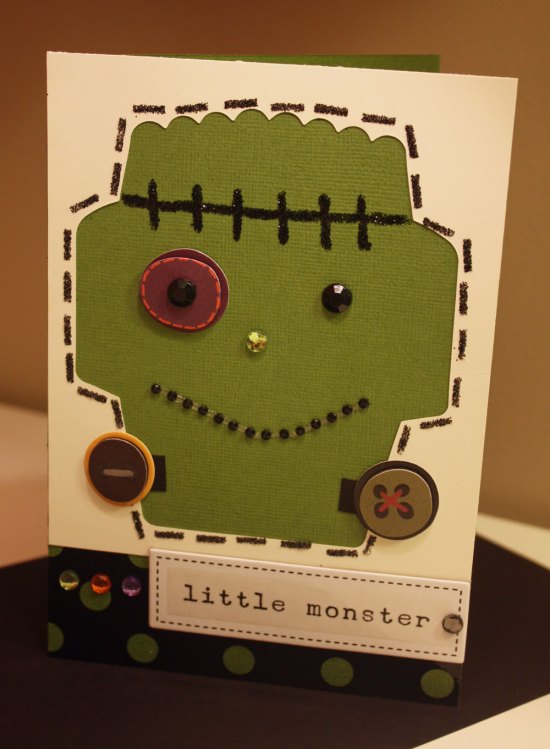
I applied the pen stitching technique across Frank’s forehead.
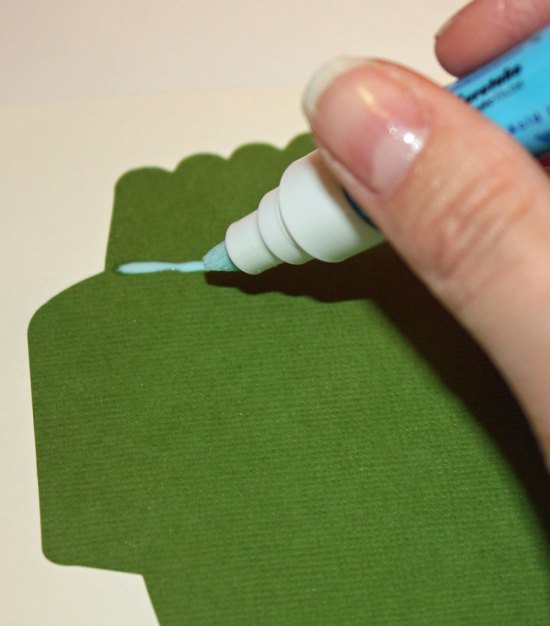
Tip: Make sure you add the glitter before the glue dries. With this pen, the glue is blue when it’s wet. Once the glue begins going clear, you’ll know it’s drying.
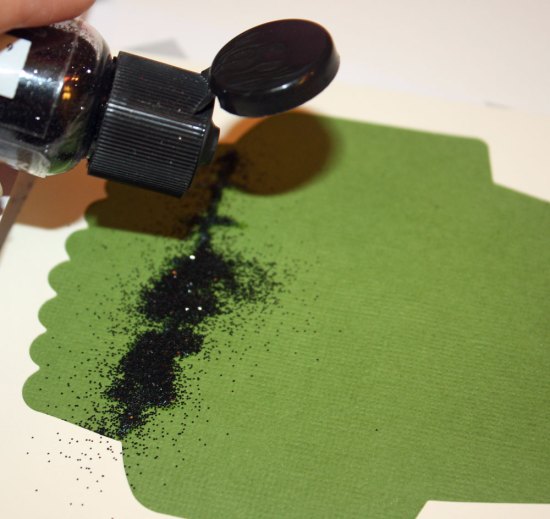
For the stitching around Frank’s head, I used small strips from my adhesive runner.
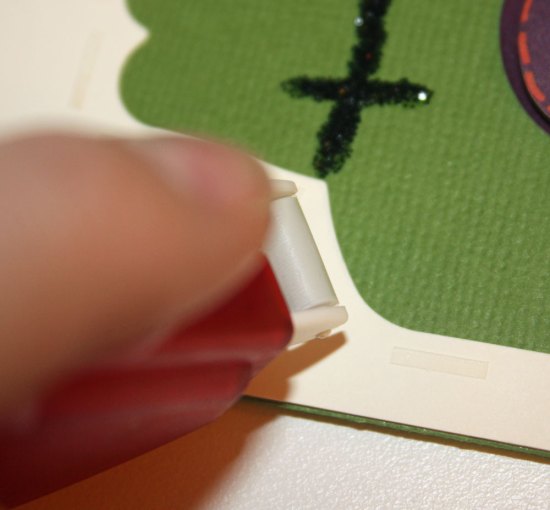
Using the adhesive strips keeps the “stitches” around the outside of the card even.

Giveaways
What’s Adhesives Week without “Glue Grab Bags?” That’s like Shark Week without the shark—it isn’t gonna happen. Everyday this week, we’ll select two winners from each post to receive an impressive bag o’ adhesive (M – Th). And we’ll conclude the fun with a special guest blogger on Friday who happens to be hosting a grand giveaway of her own!

Thanks to our Sponsors
We couldn’t have done all of this without our amazing Adhesives Week sponsors. A special thanks to each of the following companies. Way to stick it to ‘em!
3M
Aleene’s
Clearsnap
EK Success
Elmer’s
Glue Arts
Glue Dots
Helmar
Henkel
KI Memories
Kokuyo
QuicKutz
Sakura
Scrapbook Adhesives by 3L
Therm O Web
Uhu
Cheers!
Megan Hoeppner, Creative Editor
Blog at WordPress.com.
Entries and comments feeds.


 It’s a cool fall morning here in Utah, so I think we should warm up with a little “CK & Me” creativity. What do you say? As a friendly reminder, our “CK & Me” blog posts spotlight readers who’ve taken something from an issue of Creating Keepsakes and used it as inspiration to create their own awesome design. I’m thrilled to introduce three readers with you today who’ve done just this—and they’ve done it quite well, I might add.


 Supplies: Patterned paper: Ronnie McCray, Chipboard: SEI. ; Ribbon: Cosmo Cricket; Stickers: Dee’s Designs, Karen Foster and SEI.; Rub ons: Glitz Design; Adhesive: Fiskars, Judikins and 3M; Other: brad, nails, patterned paper and screwdriver head.