Weekly Warm-Up: Incredible (not so edible) eggs using your scrapbooking supplies!
03/29/2010 at 1:25 pm | Posted in General Inspiration, How-Tos, product, Uncategorized, weekly warm up | 11 CommentsTags: CK, Club CK, Club CK idea gallery, Creating Keepsakes, Creating Keepsakes magazine, decorated eggs, Earth Day, Easter, eggs, flocking, flowers, Glitter, glitter glue, Glue Dots, incredible, ink, Joannie McBride, Megan Hoeppner, paper crafting, ribbon, rub-ons, Scrapbook, scrapbook supplies, Scrapbooking, spring, technique, weekly warm up
Wait a minute! Do you realize Easter is less than a week away? Hopefully you’ve got that extra bit of spring in your step and you’re ready for an egg-xtra fun project! Megan Hoeppner and I had a blast using our scrapbooking supplies to decorate these adorable eggs. The possibilities are endless, and the results are super-way-dang (that’s like the ultimate in cuteness)! We opted not to dye our eggs before decorating them, but remember this is your creative time and you can do whatever you want!
Spot-on
These happy polka-dot eggs were easier to create than you might think. Megan first started by placing a glue dot onto her egg. She then dipped the egg into a small pile of flock, used her finger to make sure it was pressed in well to each glue dot, then gently brushed off the excess and repeated the process.
Absolutely Frilling
Ribbon is one of my favorite supplies, and ribbon scraps are perfect for decorating eggs. My orange egg was dyed using spray ink. Once dried, I adhered a large layer of ribbon around it, then a thin sheer ribbon over the top of the large ribbon. For the green and purple egg, I simply used Smooch ink, from Clearsnap, to create my green horizontal lines. Then I placed strips of ribbon in-between the lines. Finally, I tied a bow with the ribbon and adhered that to the top of my egg.
Rubbing me the right way
You can do so much with rub-ons! Megan created this fun spring scene using these yummy rub-ons from Hambly Screen Prints. The grass on Megan’s egg was created by painting small blades with Smooch ink. This same technique would be super cute on an Earth Day project, which just happens to be celebrating it’s 40 anniversary on April 22, 2010.
Speckles of happiness
This egg just makes me smile. When colors like these work so well together, it’s almost like they were two birds of a feather! Megan sprayed the egg with one color and allowed it to dry completely. Then she lightly sprayed the second color. Remember, sometimes less is more. Create a light mist affect by spraying from a distance rather than too closely.
Blooming with color
Oh my gosh! This egg is cuter than cute and definitely sprouting to the occasion. Nothing says spring like bright vibrant flowers. Add a little sparkle and the world couldn’t get any sweeter! Start by applying ink to create your petals. using a small foam square, dip one side into glitter and adhere the other side to the center of your flower. Hippity, hoppity for sure!
The write stuff
Everything’s better when it’s personalized! You can create these one-of-a-kind eggs for yourself and all your flock too. All you need is glitter glue and a little imagination.
I hope these techniques give you at least a dozen of your own incredible ideas. We’d love to see what you come up with. Share your projects with us in the Club CK idea gallery.
Joannie McBride, assistant editor
Weekly Warm-Up: Adhesives Week
10/19/2009 at 1:45 pm | Posted in weekly warm up | 150 CommentsTags: 3M, adhesive, adhesives week, Aleene's, blog candy, Clearsnap, Creating Keepsakes, creative editor, EK Success, Elmer's, giveaway, glue, Glue Arts, Glue Dots, Helmar, Henkel, KI Memories, Kokuyo, Megan Hoeppner, QuicKutz, Sakura, Scrapbook Adhesives by 3L, Scrapbooking, techniques, Therm O Web, tips, Uhu
 Looks like you’ve gotten yourself into a sticky situation, my friend. This is “Adhesives Week” on our blog! Did you get a chance to check out our comprehensive adhesives article in our October issue? Well, this is an e-expansion of that adhesives-how-to. By the time this week is through, we hope to answer some of your most common adhesive questions in the following categories:
Tips
With an entire row of adhesives available, how can I know what kind is best to use with my specific project needs? This is just one of the many glue-based questions we get asked on a regular basis. And while we did address it thoroughly in our October magazine feature, we will take it further this week.
In the spirit of tips, I’ll start this attractive party with one of my favorites:
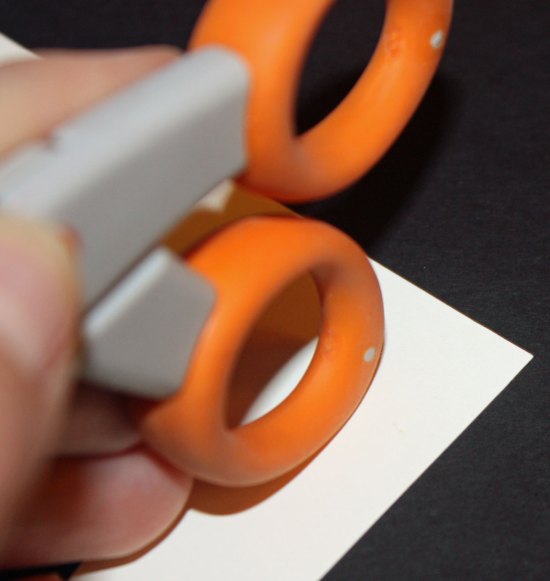
When you’re gluing and notice you’ve smudged your pretty cardstock with adhesive runoff, don’t fear. Simply use an eraser to lift the gunk from your paper. Or, if you don’t have an eraser, you can always use the soft-rubber handles of scissors—something I do on a regular basis.
Techniques
Adhesive is a must when it comes to scrapbooking, but how can I take it beyond tacking elements down? The various adhesive types offer so much in the way of creative potential. This week we’ll dedicate blog space to exploring some of these unique ideas. Let’s get started with something I put together.
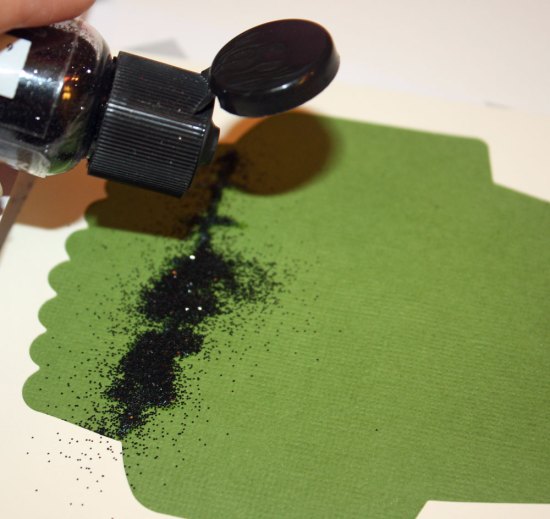
Add depth to pen stitching using a glue pen and glitter or flocking. The added texture will feel more like real stitching without the need of a sewing machine or the risk of a poked finger.
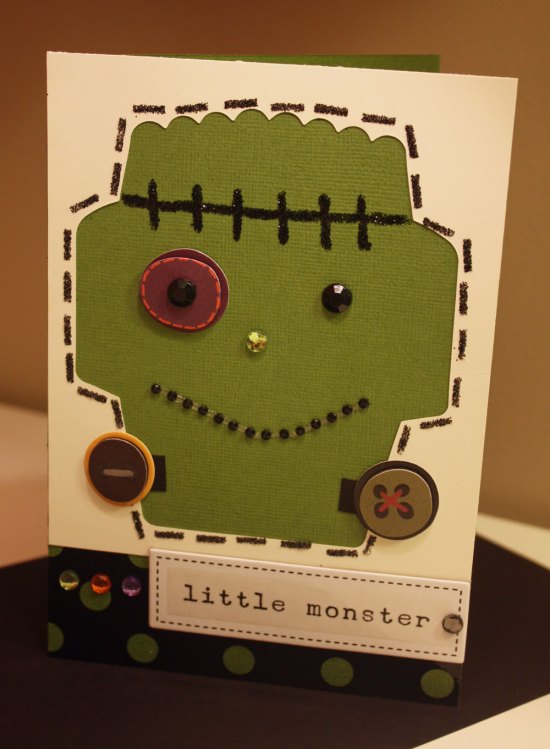
I applied the pen stitching technique across Frank’s forehead.
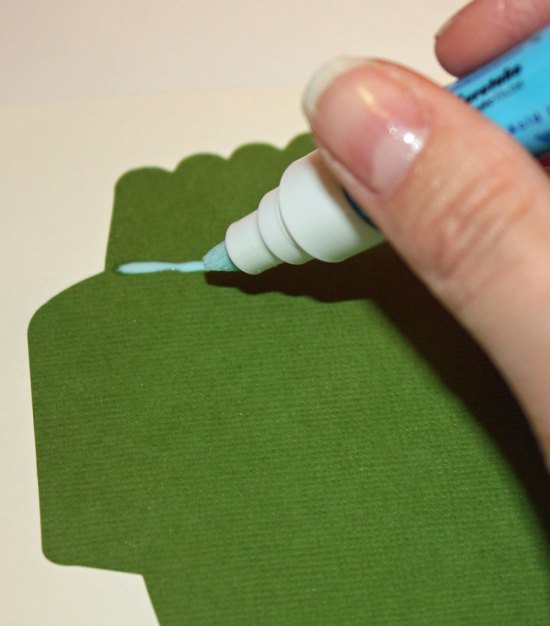
Tip: Make sure you add the glitter before the glue dries. With this pen, the glue is blue when it’s wet. Once the glue begins going clear, you’ll know it’s drying.
For the stitching around Frank’s head, I used small strips from my adhesive runner.
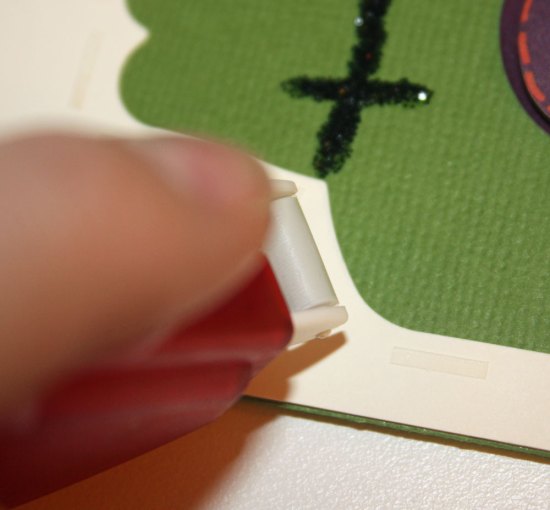
Using the adhesive strips keeps the “stitches” around the outside of the card even.

Giveaways
What’s Adhesives Week without “Glue Grab Bags?” That’s like Shark Week without the shark—it isn’t gonna happen. Everyday this week, we’ll select two winners from each post to receive an impressive bag o’ adhesive (M – Th). And we’ll conclude the fun with a special guest blogger on Friday who happens to be hosting a grand giveaway of her own!

Thanks to our Sponsors
We couldn’t have done all of this without our amazing Adhesives Week sponsors. A special thanks to each of the following companies. Way to stick it to ‘em!
3M
Aleene’s
Clearsnap
EK Success
Elmer’s
Glue Arts
Glue Dots
Helmar
Henkel
KI Memories
Kokuyo
QuicKutz
Sakura
Scrapbook Adhesives by 3L
Therm O Web
Uhu
Cheers!
Megan Hoeppner, Creative Editor
Blog at WordPress.com.
Entries and comments feeds.


 Supplies: Patterned paper: Ronnie McCray, Chipboard: SEI. ; Ribbon: Cosmo Cricket; Stickers: Dee’s Designs, Karen Foster and SEI.; Rub ons: Glitz Design; Adhesive: Fiskars, Judikins and 3M; Other: brad, nails, patterned paper and screwdriver head.